 Distort the Screen for Shockwaves and Water Ripples
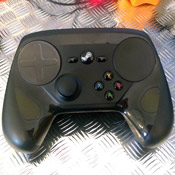 Getting a Steam Controller to work in GameMaker
As you may know I make screen transitions that I think would be interesting for games/movies/power point presentations etc. And one transition I made 2 weeks ago (at the time of writing this) has sparked two people to contact me to ask how I made it, so I thought I would write a quick guide on how I went about making the 3D rotating cube transition between rooms in GameMaker (spoiler: there is no 3D code, its just two images).
So in this guide we will be making the transition you can see above, I have used it to transition between two rooms however if you already have the images you want to use for each side of the cube face you are already most of the way there. Because of this I’m going to split the guide into two parts. First displaying the rotating 3D cube and second how we make the images of the two sides.
Before we go on I just wanted to say that I have already done a guide about making screen transitions in GameMaker on the official GameMaker blog for YoyoGames www.yoyogames.com/blog/387. If you are unsure about what you are doing lots of the variables and techniques I use are the same in both. While I see both guides as intermediate level guides the one on the GameMaker blog has a GameMaker GMZ example file that you can download and use.
Basically to make this I am going to take two images. For me one will be of the previous room and the other will be of the current room (see later for making these images), however you could use any images you wanted. I then use draw_sprite_pos() to stretch these images to simulate how a 3D cube would move (see I told you there was nothing complex or any actual 3D graphical work going on)
I also increment currentframe by 1 each turn, this will be important because this will record how far through the transition we are.
If you are unsure about using surfaces or taking screenshots in GameMaker well lucky you, I already wrote a guide for surfaces and screenshots here.
Let’s first start with the most important block of code. This is where all the magic happens, this is where we draw our two images onto the screen:
DRAW EVENT:
draw_clear(c_black) // make everything behind black

// drawing the doors
var widthamount = EaseOutQuad(currentframe,0,room_width,maxframes)
var totalpinchamount = 120 // how much I want the image to move up/down on each edge of the screen
var pintchamount = EaseOutQuad(currentframe,0,totalpinchamount,maxframes)
// it looks nice just to slightly fade out the left door as this gives it a fake shadow
var alpha = 1-EaseOutQuad(currentframe,0,0.7,maxframes)

draw_sprite_pos(rightroom,0,    0,totalpinchamount-pintchamount,
				widthamount,0,
				widthamount,room_height,
				0,room_height-(totalpinchamount-pintchamount),1) // left new screen
draw_sprite_pos(leftroom,0,      widthamount,0,
				room_width,pintchamount,
				room_width,room_height-pintchamount,
				widthamount,room_height,alpha) // right old screen
As you can see I use a function called EaseOutQuad(), this isn’t required but helps convert a linear number into a curve. If you are familiar with easing functions you will know there is nothing complex about it, if not it isn’t essential and just gives a nice spin to the cube. I have written a guide about Easing in GameMaker which will be helpful if you haven't done it before, Also this site might help make sense of it: easings.net
SCRIPT:
/// EaseOutQuad(inputvalue,outputmin,outputmax,inputmax)
argument0 /= argument3;
return -argument2 * argument0 * (argument0 - 2) + argument1;
STEP:
currentframe++
if (currentframe > maxframes ) {
    instance_destroy() // We are done with the transition, destroy it and tidy up
}
So that’s everything we need for making the two images look like they are rotating. Not bad for 13 lines of code.
Now lets look at how I made those two images.
I use a persistent object that turns an image of the current screen into a sprite with sprite_create_from_surface() it then changes the room with room_goto() and on the next frame it takes a second screenshot of the new room. I call these images leftroom and rightroom.
CREATE EVENT:
currentframe = 0
maxframes = 60 // how many frames it takes to do the transition
leftroom = sprite_create_from_surface(application_surface, 0, 0, surface_get_width(application_surface), surface_get_height(application_surface), false, false, 0, 0);
room_goto(room_second) // This is now where we change room
alarm[0] = 1 // take image of the next room
Now we have an image of the first room we want to wait until we are on the second room and take an image of that:
ALARM 1 EVENT:
rightroom = sprite_create_from_surface(application_surface, 0, 0, surface_get_width(application_surface), surface_get_height(application_surface), false, false, room_height, 0);
The last thing we should do is once the transition is over destroy the images we made. I don’t know if we need to do this because the images might be removed when the object is removed. However I didn’t want to risk that and it’s easy just to remove them here:
DESTROY EVENT:
/// Tidy up everything
sprite_delete(rightdoor);
sprite_delete(theroom)
This is perfectly compatible with the WebGL HTML5 module in GameMaker, however GameMaker can be more strict when using sprite_create_from_surface() in HTML5 so you may need to test and move the code around a bit.
I bet you are kicking yourself to see that it is so easy. Before I leave you I would like to mention some things:
First that the screen transition can look like the cube is moving too fast to start off with. The reason for this is because when someone clicks on a button to change screen they want instant confirmation that the action has been done, it would look better to slowly start the transition but then for a few frames the user would wonder if they had clicked the button successfully.
Secondly when using draw_sprite_pos() in GameMaker internally it must cut the image into triangles, because of this you can see a slight tear in the middle of the cube if you know where to look, normally this wouldn’t be a problem because everything moves too fast to be obvious, but the perfectionist in me would love to find a solution to this. Do contact me if you have any ideas.
Lastly these places may have topics that interest you:
My guide on how to use surfaces.My guest post on YoyoGames Blog on room transitions.
Other screen transitions you may want to try.
Graphs of different easing patterns you can use.